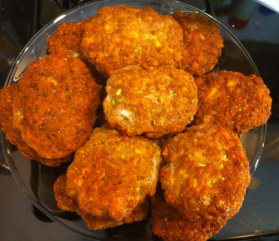
 Delicious cooked Polpettes. Delicious cooked Polpettes. It's not really Italian for Delicious, but it should be. My Grandma Brumley (dad's mom) pronounced them "peh-PEH-tees." Even though "polpette" is "meatball," I don't think of these as meatballs. It's probably because they were only and ever called polpettes, and my Grandmother formed them into oval patties instead of balls. My Grandmother was an amazing little Italian woman, but the extent of the exposure I had to my Italian roots is this recipe and the memory of my Grandmother speaking Italian to a friend. Once. And the unibrow, but we won't talk about that. Grandma made these every time we visited, so memories of food at her house are filled with the smell and taste of polpettes. I can remember the way the mix smells before it's cooked, the smell of them cooking permeating the house, and the delicious little patties. I'd lightly salt mine and then gobble them up.
When I was little, my mother asked Grandma for the recipe. She planely told Mom there wasn't one. Mom doesn't give up though, she followed Grandma around as she made them and wrote down everything that went into these delightful treats. She did this twice, and the ingredients are the same, but the quantities are different. ... because there's no recipe. My Grandmother passed away in 2003 and I find myself making these when I miss her, or when I long for those childhood summers spent with Dad's family, or whenever I just crave them.
I can't bring myself to make any changes to the "recipe" even though I tweak EVERY recipe I get my hands on. Something about making changes doesn't sit well, it's like a horrific insult to my Grandmother and her memory even though I can look at the recipe and think of a hundred things that can be changed or tweaked. Even though, I'm sure she's made changes over the years depending on what ingredients were and were not available. I. Just. Can't. Do. It. So I don't. I'll just honor her (and my childhood memories) in my own way by staying true to what I know to be how she used to make polpettes when I was a kid. If I make something similar, they'll be "meatballs" ... so in my mind, something completely different and I realize it's totally silly and I'm OK with that. :-)
Polpettes (aka. Pepeties)
Ingredients | Version 1
1 lb. ground beef
1 16 oz. box of Saltines, crushed
8 to 10 eggs
1 sm. can Kraft Parmesan Cheese
3 cloves garlic, minced
1 stalk celery, finely diced
salt and pepper to taste | Version 2
2 lb. ground beef
1 16 oz. box of Saltines, crushed
18 eggs
6 oz. Kraft Parmesan Cheese
10 cloves garlic, minced
4 stalks celery, finely diced
2 tsp. salt
1/4 tsp. pepper | Directions
Combine ground beef, 3 of the 4 sleeves of crushed crackers, 3/4 of the eggs, parmesan, garlic, celery, salt, and pepper in a large bowl. Mix by hand to thoroughly incorporate all ingredients. If the mixture is too dry/hard, add eggs one at a time to moisten the mixture. If it is too wet, add more Saltines a little at a time. The mix should be about the consistency of a meatloaf or slightly softer/moister than plain hand-formed hamburgers.
Place a large skillet on the stove at medium-high heat. Add enough vegetable oil to cover the bottom of the pan with about 1/8" of oil. Let oil heat until you see ripples before adding the polpettes for frying.
While oil is heating, form oval shaped patties using about 1/2 cup of the mixture (no larger than a lemon before forming patties).  Frying polpettes with foaming oil. Frying polpettes with foaming oil. Once oil is heated, add patties to the oil. The oil should bubble when the polpette is added and will end up foaming up as the patties cook (see photo to the left). Cook about 3-6 minutes on each side (depends on how thick the patties are) until beautifully browned on both sides and cooked through. Remove from pan to a plate with paper towels to drain excess oil. As you cook more polpettes, you will need to add a little more oil to the pan as the patties will absorb some oil as they fry.
We always ate these plain, but I have served them along side pasta and with a salad as well. They're a great hearty snack or a lunch on the go. They refrigerate and reheat well either in the microwave or oven, though the oven is better in my opinion. Raw polpettes can also be frozen with wax paper between layers and can be stored for at least 6 months - I imagine they'd store longer, but that's just a theory in my house. Any frozen polpettes are lucky to last 3 months in my house.
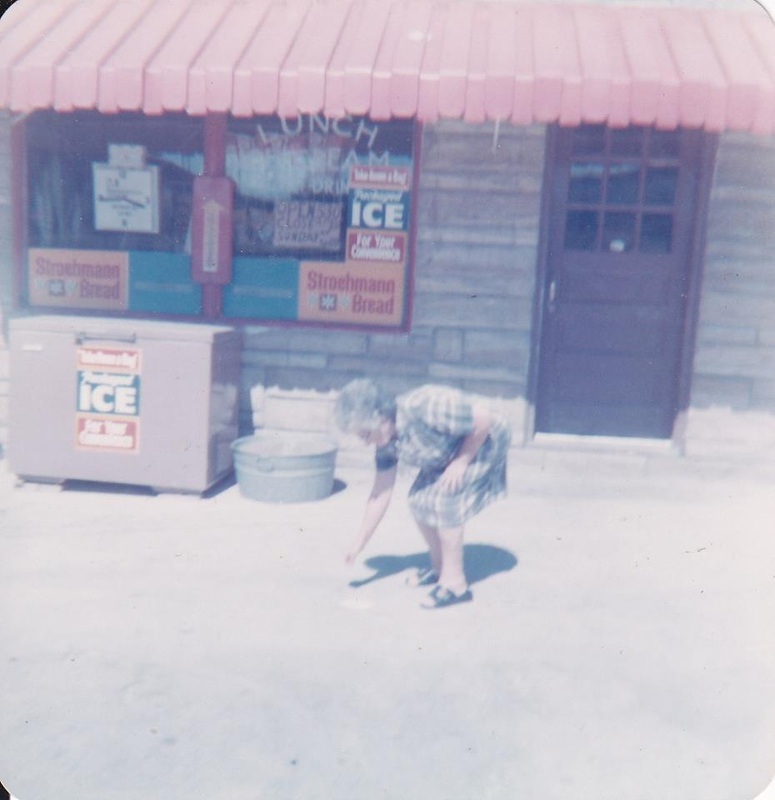 Grandma Brumley outside the family store.
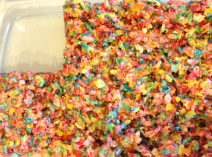 I love Fruity Pebbles. I always wanted them as a kid, but didn't often get them ... I mean, they're pure sugar, what responsible parent would let their kids eat that? :-) Instead I had Fruit Loops, Apple Jacks, or Apple Cinnamon Cheerios ... because they're not all sugar or something. Back to the Fruity Pebbles! I had a recent renewed obsession with them. It started a few years ago when I arrived at my office one morning. The cleaning crew shampooed the carpets over night and the residual smell was eerily similar to Fruity Pebbles. I sat at work all day craving them and stopped at the grocery store on the way home to pick up a box. I promptly had two bowls of the stuff for dinner but was quickly reminded of how soon the colorful flakes turned to mush in milk. I also grew up loving Rice Crispy Treats (what American kid didn't?). I know this isn't a new combination, but it was to me - I turned my Fruity Pebbles into Fruity Pebble Treats. It's really quite a simple process and I was chowing down on these less than an hour after I started - cooling time is non-negotiable.
Fruity Pebble Treats
Ingredients
1/4 cup butter
10 oz bag of marshmallows
6 cups Fruity Pebbles
Directions
1. Grease a 9x13 pan with butter or cooking spray.
2. Melt butter in a sauce pan over medium heat.
3. Add marshmallows to melted butter. Stir constantly until marshmallows are completely melted.
4. Add Fruity Pebbles to the marshmallow mixture and fold into marshmallow mixture. The mix will stick together and be difficult to stir, just keep stirring and folding until the Fruity Pebbles are fairly evenly coated.
5. Turn Fruity Pebbles out of the pot, into the 9x13 pan and lightly press into the pan with a lightly greased spoon or spatula. You can also do this with your fingers, but you'll need to grease your fingers first or the marshmallow will stick to you.
6. Let cool for about an hour before cutting and serving. If it is hot and humid, it may take longer to set.
7. These can be cut into individual serving sizes (sadly, 9"x13" isn't a proper serving size) and wrapped in wax paper to keep them from sticking to each other. Store in an air-tight container.
I quite like these with a large glass of milk. It's all the sweet, crunchy deliciousness of Fruity Pebbles, without getting soggy in the bowl. The great thing about this recipe is that you can add any breakfast cereal to this to make it your favorite treat.
Left Overs!
Why do you have left overs? Eat and share them now!
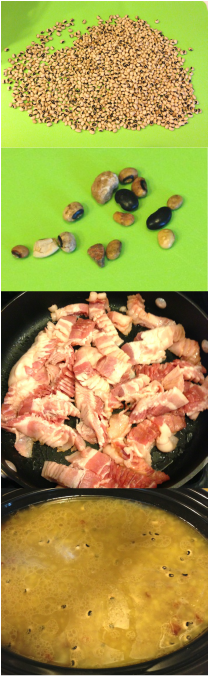
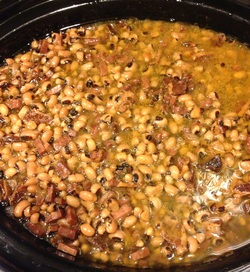 Growing up, I remember the smell of beans simmering in my Great-Grandmother's kitchen all day. Pinto beans, navy beans, and who knows what else. I was too much of a chicken to try the beans as a kid, but I can still smell them. The earthy smell of the beans, the rich smell from the ham hock, so savory! These scented memories evoke the thoughts of the archetypal Home in my mind. I never gave thought to making my own beans until I was shopping for tea. Makes perfect sense, right? I buy loose leaf Darjeeling tea, and the only place I can find it is at the local Indian groceries. Every time I go to buy tea, I shop down every isle to look at all of the interesting foods and I'll usually pick up something new to try. The last time I was there, I looked at all the beans and found a bag of black eyed peas that were the tiniest beans I'd ever seen. So I bought them because they were cute. ... Don't judge! :-) But then I had a bag of beans that I had no idea what to do with. Mom never made them that I can remember, and neither had I, so I was flying blind. I started where I always start when I want to make something new. I search the Internet. I look at all of the recipes I can find, identify the commonalities and then either pick the recipe that sounds the best or combine what I think are the best bits from several recipes to make my own. I didn't want to soak the beans overnight and then simmer for hours, and thankfully I was able to find several recipes for slow cookers that used the dry beans (no soaking!).
Black-Eyed Peas
Ingredients
2 pounds dried black-eyed peas
6 cups chicken stock (low sodium)
6 cups water
3 cubes vegetable boullion
3 cubes chicken boullion
2 tsp Season All
1 pound cooked ham/ham steak, diced
1 pound bacon
1/2 cup butter
2 large onions, diced
Salt and pepper to taste
 Directions
1. Pick through the black-eyed peas to remove any foreign objects, stones, or generally sad looking beans. The beans will be fairly uniform in appearance, so finding things to pick out is typically easy. The second picture on the left is what I pulled out of my beans. I also pull out any beans that aren't the right color or look splochy or wrinkly.
2. Add the beans, chicken stock, boullion, Season All, and diced ham to a 6 quart crock pot set on Low.
3. Cut the bacon into 1/2 to 1 inch pieces and add to a large frying pan to brown, stirring frequently. When the bacon is crispy, remove the bacon from the frying pan with a slotted spoon and add to the crock pot. Reserve the bacon grease in the frying pan for the next step.
4. Add the butter to the bacon grease in the frying pan and melt. Once the butter is melted, add the diced onions and cook over medium heat until the onions are translucent. Stir frequently.
5. Add the onions and the grease to the crock pot. Stir to incorporate. Cook on low for 8-10 hours, stirring about once an hour.
Immediately after cooking, I thought these beans were only OK. They still had an earthy flavor which faded as time went on. They magically taste better the longer they sit in the fridge, and by the end of the week I was going bonkers over how good they were!
The black-eyed peas are great served as a side to chicken and corn bread. I also had them with burgers for a cook out and even heaped a spoon full of the beans onto my burger. It was delicious!
Left Overs!
While these beans are perfectly delicious reheated either in the microwave or in a pan on the stove, I still wanted another way to use these delicious beans.
Black-Eyed Burgers
Ingredients
3 cups drained black-eyed peas
3 Tbsp all purpose flour
Salt and pepper to taste
1 package potato buns
Directions
1. Mash the black-eyed peas in a bowl with a fork or potato masher.
2. Add the flour, and stir in with a fork to thoroughly incorporate.
3. Form patties that are about three inches wide and 1/3 inch thick.
4. In a large frying pan, add oil (or butter or bacon grease) and heat the oil until it forms dimples in the surface. This shows the oil is heated to the proper temperature for pan-frying.
5. Add the patties to the hot oil and cook 3-5 minutes on each side until nicely browned.
6. Serve on potato buns. I added a little mayo and cooked bacon to my sandwich.
This recipe lends itself to a lot of variations. If you're feeling spicy, you can finely dice and sauté up some jalapenos and put them in the bean mixture. You could add sautéed onions or bell peppers as well. Crumbled up bacon would do well in the "burgers" too. We found these "burgers" to be incredibly filling and outstandingly delicious. We both wanted to eat a second "burger" but we were so stuffed from the first one we just couldn't!
Also, I have some vegetarian friends, but I sadly cannot think of an equally delicious vegetarian version of this dish. There is really no substitute for the bacon and ham as these are very big flavoring componants of the dish. That being said, if you have a vegetarian version of black-eyed peas that you love, please share it!
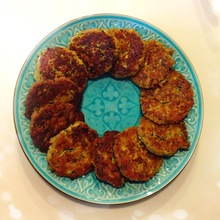 One of the few veggies I like is zucchini. And by like, I mean breaded, deep fried, and served with Ranch dressing or tzatziki. I stumbled across a recipe for "zucchini cakes" and figured I'd give them a try. I made my own edits to the recipe - it's what I do. I love these patties. I eat them with Ranch dressing, but they're also a great compliment to pasta with tomato sauce. I think they would make a great vegetarian "meatball" to serve with spaghetti. My version of the recipe is below. If you want to go the "meatball" rather than the patty route, simply form the mix into 1-inch balls instead.
I'm usually a stickler for using genuine Parmigiano Reggiano, but it's expensive. In this recipe it would make very little difference in taste if you use the real stuff, the pre-grated Parm from the deli, or the Kraft Parm in the green canisters so it's not really necessary to spend the money if you don't have to.
Zucchini Parmesan Patties
Ingredients
2 large zucchini, grated, excess water removed*
1 cup freshly grated Parmesan cheese
1 cup panko bread crumbs
1 cup Italian seasoned bread crumbs
1/4 tsp paprika
1/2 tsp Season All
1/4 tsp garlic powder (or 2 cloves garlic, minced)
1/4 tsp salt
1/8 tsp pepper
2-3 eggs
Olive Oil
Directions
1. Grating the zucchini by hand is easy and goes very quickly. Once grated, lay out a dish towel, place two layers of paper towels on top of the dish towel, then place the grated zucchini in the middle. Wrap the towel around the zucchini either like a pouch or like a hard candy wrapper and squeeze as much water out of the zucchini as possible.
2. Add the zucchini to a large mixing bowl along with all other ingredients except the eggs and olive oil. Lightly mix the ingredients, and add two eggs. Mix by hand until eggs are completely incorporated. Form a patty with about two tablespoons of mix and see if it will hold together. If the mix is too loose, add and mix in the third egg. Form patties about 1/4-1/2 of an inch thick.
3. Heat a large pan over medium-high heat and cover the bottom of the pan with olive oil. Let the oil heat until you start seeing ripples/dimples in the surface of the oil. Place patties in pan and cook 3-5 minutes on each side until they are nice and brown. You may need to add more oil as you remove and add more patties. Try to let the oil heat up before adding new patties to the pan.
4. Once patties are cooked, drain on a plate covered with paper towels (1-3 layers). Serve with your favorite pasta or Ranch dressing.
Left Overs!
So what do you do with these guys after they've sat in the fridge? They taste fine if they're microwaved, but they lose that wonderful crisp from frying. They can be reheated in the oven to reclaim some of the fried texture. Just place a rack on a cookie sheet, then put your patties on the rack. Bake them at 350 for about 12 minutes to get them nice and hot.
|
 RSS Feed